
![Dirty Dozen: 12 TOP Composting Methods [Pros, Cons & Costs]](https://cdn.store-assets.com/s/616433/f/7205477.jpeg)
The Dirt on Making Dirt
Creating compost is as valuable as it is variable. There are many ways to break down organic matter, so the question becomes: which composting method will work for your home?
This article will break down 12 different composting methods and technologies, their pros, cons, costs, and provide instructions for each.
Let’s dig in.
1. Compost Pile or “Heap” Compost
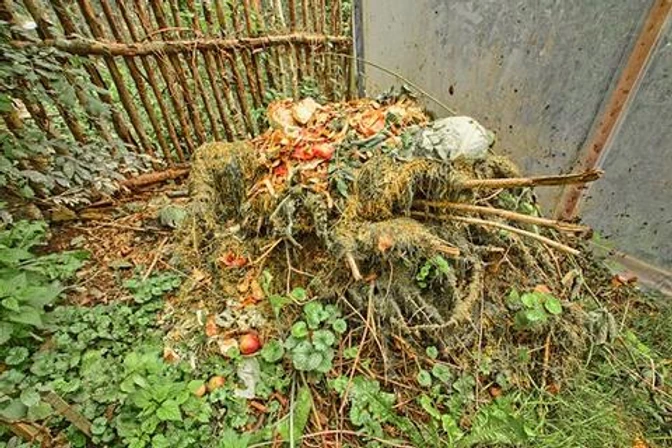
Otherwise known as the “hurry up and wait” method, a traditional compost heap is best for those lucky enough to have enough yard space to permit a large pile of moist detritus. Heap compost can be either cold, or hot.
Note: What’s the difference between cold and hot compost? Our article “How Compost Works: A No-Nonsense Guide To Compost Science” will walk you through it.
MATERIALS
Yard space
Shovel
Green scraps (1 part)
Dry carbon materials (2 parts)
INSTRUCTIONS
Designate area in your yard or garden (minimum 2 ft x 2 ft)
Collect browns & lay them down as a base layer
Collect “greens” & add them to brown layer
Add browns & greens regularly (1:2)
Ensure heap remains moist (like a damp sponge)
*Optional (for hot compost): Mix once a week, or when internal temperature reaches 150 - 160℉
PROS
Inexpensive
Zero prep work required
Hot or cold composting
Easy to harvest
CONS
Requires regular manual turning (if hot)
Might attract pests
Emits methane
Requires ample yard space
Difficult to compost during winter months (if not impossible)
Unattractive & unappealing
Cannot compost meat or dairy
COST
$ free
DURATION
3 months - 18 months
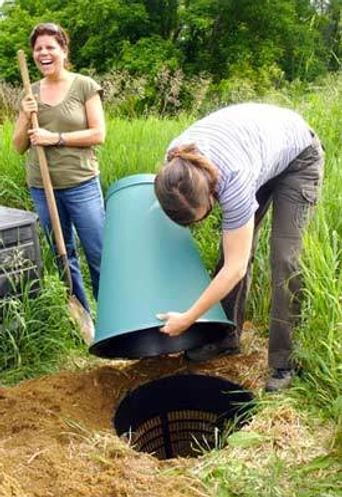
2. Pit or Trench Composting
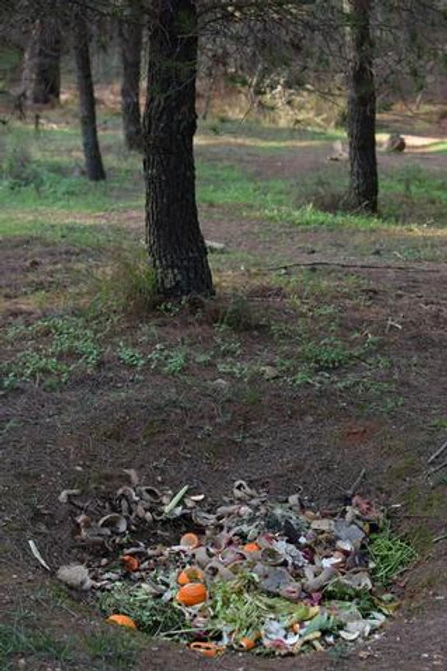
Like the name implies, this method involves digging a pit or trench in your yard, adding food scraps to the hole, then covering it back up again. This method is best for gardeners who know well in advance of the growing season the area in which they’d like to have rich, fertile soil.
MATERIALS
Yard space
Shovel
Green scraps (1 part)
Dry carbon materials (2 parts)
HOW-TO
Designate area in your yard or garden (minimum 2 ft x 2 ft)
Collect “greens” & add them to the hole
Cover the “greens” with soil and pack down with shovel
*Optional (to protect soil layer): add “brown” material over “greens” prior to covering the hole with soil
PROS
Inexpensive
No turning required
Invisible
Feeds garden in situ (you can bury scraps wherever you plan to garden)
CONS
Requires digging a hole/trench
Composting meat or dairy products might create pathogens & attract pests
Cannot harvest compost after the fact
Takes a long time to break down
Hot composting not possible
Cannot compost during winter months
Not portable
You need to store food waste until you can bury it
Requires garden/yard space
COST
$ free
DURATION
6 months - 12 months
3. Compost Tumbler Method
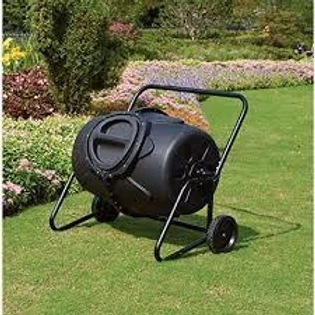
A compost tumbler is an ingenious design which makes aerating compost as easy as turning a handle. This is one of the choice composting methods for folks who live in a condo, or with very little (or no) yard space.
MATERIALS
55 gallon drum with turning mechanism/compost tumbler
Shovel-full of rich soil (added once or twice per load) to increase microbes
Green scraps (1 part)
Dry carbon materials (2 parts)
HOW-TO
Install tumbler - preferably an outdoor space with good ventilation
Collect “greens” & add them to the tumbler
Collect “browns” and add them to the tumbler
Turn handle 1-3 times a week
PROS
Easy to turn
Can be kept in small (outdoor) spaces due to small size
Keeps out vermin
CONS
Hot composting is not easy due to turning regularity, which spreads pathogens & weed seeds
Limited volume
Harvesting is difficult (awkward to empty)
Cannot compost easily during winter months
Cannot compost meat & dairy
COST
$ 20 - 225
DURATION
3 - 6 months
4. Compost Bin Method
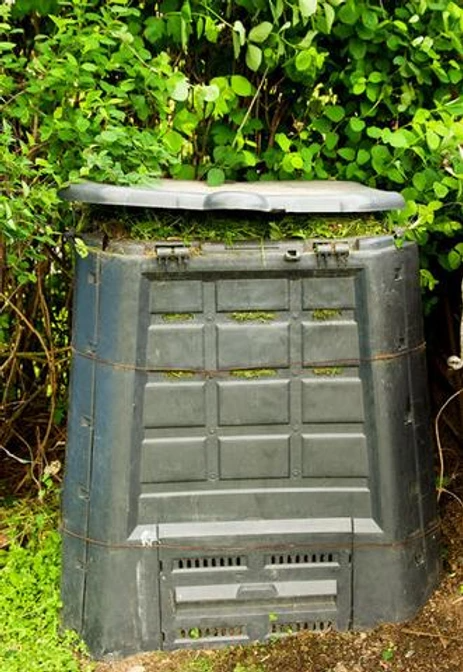
A compost bin is a bit like a tumbler and heap method combined: a contained heap, or a motionless tumbler!
MATERIALS
A drum/bin/bucket, preferably dark in color with a lid and an open bottom
Green scraps (1 part)
Dry carbon materials (2 parts)
HOW-TO
Place bin outside (on grass)
Collect browns & lay them down as base layer
Collect “greens” & add them to brown layer
Add browns & greens regularly (1:2)
Ensure heap remains moist (like a damp sponge)
*Optional (for hot compost): Mix once a week, or when internal temperature peaks at 150 - 160℉
PROS
Small-space friendly
Low-maintenance
Keeps out vermin
CONS
Outdoors only
Turning is a challenge
Depending on the bin material (wood), may rot under wet conditions
Limited volume
Might generate odors
Cannot compost meat or dairy products
COST
$ 25 minimum
DURATION
3 - 12 months
5. Three-Bin Compost Method
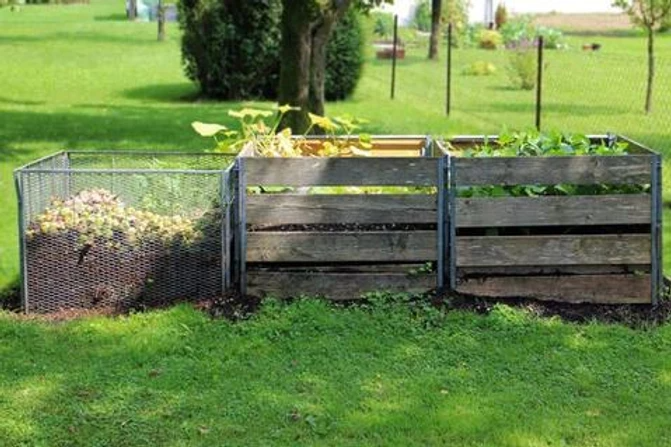
This method is one of the most efficient composting methods, though it is one of the most involved. The three-bin system works in a level system: the first bin is for the “just-started” compost pile.
Once this part heats up to a peak of 160℉, you’re ready to send the contents of the first bin into the second bin, leaving your first bin available for more compost materials. Repeat process until you have a beautiful finished product in your third and final bin.
MATERIALS
Three-bin compost system (wood, wire, mesh, plastic)
Shovel/Pitchfork
Green scraps (1 part)
Dry carbon materials (2 parts)
HOW-TO
Install a three bin/box system in your yard
Collect browns & lay them down as base layer
Collect “greens” & add them to brown layer
Add browns & greens regularly (1:2)
Ensure heap remains moist (like a damp sponge)
When internal temperature peaks at 160℉, switch compost contents into the second bin
Repeat until bin contents have “cooked” through and you are left with a third bin full of completed compost
PROS
Hot compost option
Easy to access
Easy harvesting
Easy to maintain once installed
Simple concept
CONS
Outdoors only
Manual turning required
Depending on the bin material (wood), may rot under wet conditions
Not portable
Requires ample yard space
Cannot compost meat or dairy products
Can be expensive & time-consuming to build
COST
$500 - $2,000
DURATION
3 months - 12 months
6. Vermicompost
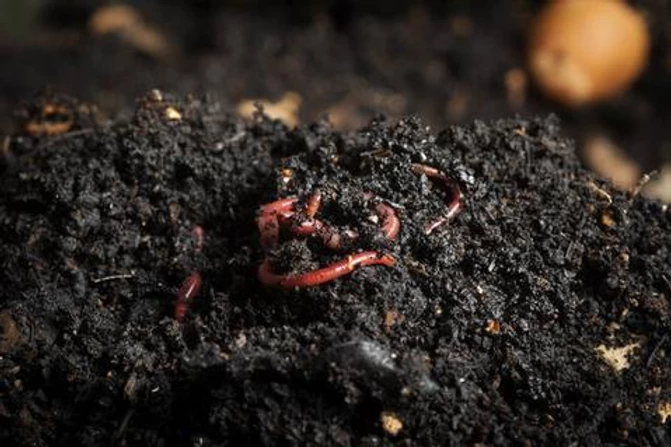
Vermicompost is an excellent option for the busy, small-space gardener. By getting worms to do most of the work for you, this is one of the most hands-off compost methods around.
Red Wiggler worms are the most popular choice for worm composting: they are extremely efficient waste-eaters!
MATERIALS
Well-ventilated wooden or plastic box (1 square foot for every 2 lbs of worms)
Green scraps (1 part)
Dry carbon materials (2 parts)
Minimum 1 lb Red Wiggler worms
HOW-TO
Purchase or build a well-ventilated worm box
Purchase or source a minimum of 1 lb of Red Wiggler worms
Collect browns & lay them down as base layer
Collect “greens” & add them to brown layer
Add browns & greens regularly (1:2)
Ensure that your worms’ home is sufficiently moist and is properly aerated
Drain “worm tea” as needed
PROS
Small-space friendly (including indoors)
Low-maintenance system
Tidy materials
Winter composting possible
Creates compost tea as well as worm casings
CONS
Requires regular moisture
Attracts pests, including fruit flies
Danger of poisoning or overfeeding your worms (ex: only a small amount of meat, or none at all)
Drainage & some maintenance/care required
Not ideal for people or children with tactile sensitivities
COST
$20 - $200
DURATION
3 months - 4 months
7. Chicken Coop Compost
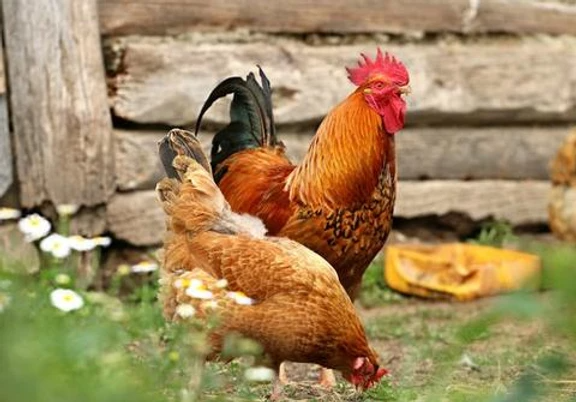
Just hear us out: chickens are some of the cheapest & cheeriest pets to care for, not to mention some of the most efficient waste diverters. Chickens are natural “scratchers”; turning compost is pretty much in their DNA!
If your home is or could be set up for a chicken run and coop, and you’re interested in sharing your home with some clucky little ladies, then you’d be in the perfect position to feed the majority of your food scraps to your new pets.
MATERIALS
Chicken Coop
Fencing/enclosure
Water supply
Heat supply (for winter months)
Additional food supply (chicken feed)
Food scraps
Carbon-based bedding (straw, cardboard, wood shavings)
HOW-TO
Install coop & enclosure
Purchase chickens & “accessories”
Put down carbon-rich bedding, with an added layer in one corner of the coop
Add kitchen scraps to the extra bedding layer
Intersperse a daily load of kitchen scraps with a few scoops of carbon-bedding
PROS
Chickens like to scratch - no turning required!
Reduces amount of feed purchased for chickens
Improves quality of eggs
Hot and cold compost option
Chickens consume bugs/pests (even some rodents!)
CONS
Must have local permissions to have farm animals/chickens
Generate ammonia-dense feces
Regular clean-up and care required
Requires winterized enclosure
Additional food supply
Potential vet bills
Cannot add most meats, dairy or processed foods
Requires ample yard/outdoor space
COST
$5 - $10 (per chick), $ 10 - 25 (per chicken) ; $ 200 - 1000 (coop) ; $ 35 per bag (chicken feed)
DURATION
3 months - 4 months
*(dependent on the number of chickens & regularity of scrap collection)
8. Black Soldier Fly Composting
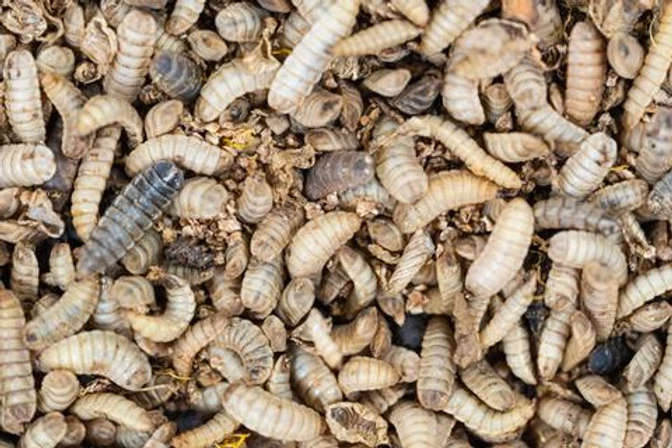
Black Soldier Flies (BSL) are naturally industrious insects whose larvae feed on decaying food. These little guys are naturally occuring in areas with a good amount of decaying material, and on farmyards with a chicken coop (chickens love to eat the larvae!).
MATERIALS
Enclosure/container
Dry carbon materials (2 parts)
Food scraps (1 part)
HOW-TO
Install enclosure/container
Collect browns & lay them down as base layer
Collect “greens” & add them to brown layer
Add browns & greens regularly (1:2)
Ensure heap remains moist (like a damp sponge)
Wait for BSL to begin harvesting your waste
*Optional (if you would rather not wait for a BSL colony to move in): you can also purchase Black Soldier Fly larvae by the pound from certain gardening or farm supply stores
PROS
Speeds composting process up
Larvae & flies are harmless to humans & pets
Naturally-occuring, especially near farmyards
Attracts birds
No turning required
Can serve as additional source of chicken feed (protein)
CONS
Outdoors only
Meat and dairy will attract other pests, and risk pathogens
Unappealing
Noisy (flies buzz as loudly as bees)
Winter-composting is difficult
Not as easily purchased as Red Wigglers
COST
Free - $20
DURATION
1 larvae consumes twice its own body weight in one day
*(dependent on number of larvae & amount of waste)
9. Green Cone Composter
This nifty innovation is one of the cleverer designs for speeding up waste decomposition. Shaped like a giant green pilon, the Green Cone helps to circulate air to your food scraps and allows the existing bacteria and worms in your garden soil to break down your organics.
MATERIALS
Green Cone composter
Food scraps
HOW-TO
Install your Green Cone compost system on a flat, open-soil surface with excellent drainage
Add food scraps daily to the removable basket daily/as needed
Ensure that the scraps are not overflowing from the Green Cone installation site at any point
PROS
Handles an average of 2 liters a day of food waste (even in winter)
No pests
No odors
No turning
Emptying required only ever 5 years or so
No maintenance
Can take meat, bones, dairy & some animal excrement
Does not require carbon (brown) materials
CONS
Outdoors only
Slows down/becomes near impossible during winter months without accelerant additive
Requires specific site conditions
No compost to harvest, in situ only
Not portable
Requires additives
COST
$135 (not including additives)
*available for government subsidy in certain municipalities
DURATION
5 years (ongoing)
10. Sheet Mulch
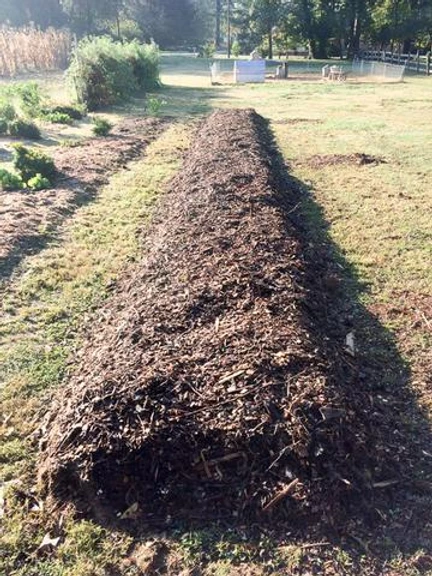
Similar to trench composting, sheet mulch is excellent for the permaculture gardener with a clear plan of where and how they would like to utilize their yard space for gardening. In theory, sheet mulching is like an inverted trench compost system.
Many gardeners choose sheet mulching because it mimics the natural process of soil creation through layering of both carbon and nitrogen-rich materials.
MATERIALS
Food scraps (1 part)
Dry carbon materials (2 parts)
Rake
*Optional: soil amendments, existing compost, selected seedlings
HOW-TO
Select location for your sheet-mulch garden bed
Lay down dry carbon bedding
PROS
Very little digging or tilling
No turning
Mimics natural process
Drought resistant, holds water
Smothers weeds
All-season composting
Can harvest sections easily/as needed
CONS
Requires levels of carbon (brown) materials
Requires yard space
Unnattractive
Not portable - in situ only
Attracts slugs & other pests
Cannot compost meat or dairy products, green only
Requires more green materials than you might have at one time (& manure)
COST
Free
DURATION
Ongoing - permanent fixture
11. Bokashi Bucket

A bokashi bucket system is an ancient form of food waste diversion, developed in Japan. While not technically compost, it does reduce the volume of your food waste by up to 90% and can be held in a very small space - even indoors!
MATERIALS
Bin with drain
Inoculated bran
Outdoor area for burying bokashi scraps to “cure”
Shovel
HOW-TO
Purchase bokashi bin, or create your own (with spigot and lid)
Add “greens”, including meat and dairy
Sprinkle a thin layer of bran over food scraps
Repeat layering until bin is full
Once bin is full, remove to a secondary location (cool and out of direct sunlight)
Every day or every second day, drain off liquid from spigot (can be used in diluted forms as spray-on fertilizer)
After 10 days, bury pickled food waste remains a minimum of ½ foot deep, cover and pack down with shovel
PROS
No turning
Small-space friendly
Creates concentrated natural fertilizer/slug-killer
CONS
Not technically compost (anaerobic/fermentation process)
Requires additional curing period underground
Requires regular additives
Must dig up cured compost to harvest
COST
RM90 - RM400 + RM15 bi-yearly (for additives)
DURATION
4 weeks approximately (2 weeks in the bin, 2 weeks in the ground)
12. Food Recyclers
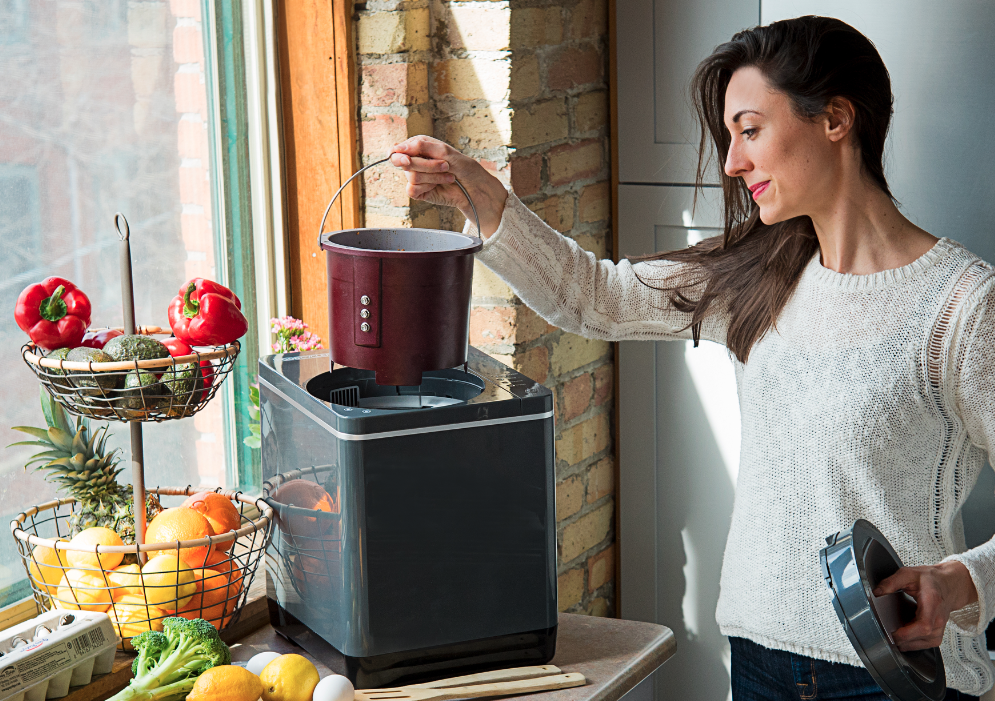
The most modern version of traditional composting, food recyclers have revolutionized an age-old process into something which can go from plate to garden in in a single day (or less).
MATERIALS
Food recycler unit
A working outlet
HOW-TO
Add food scraps to unit
Turn unit on
PROS
No turning
Zero odors
Zero pests
Nutrient-dense organic fertilizer
Does meat, dairy, some bones & processed food
Quiet
Small-space friendly
Breaks down food waste by 90%
Zero methane emissions
Zero maintenance
Zero-very few additives
Portable
Takes up to to 6 liters of food waste a day
By-product is completely sterile and pathogen-free (kills weed seeds)
Completes cycle in 3-24 hours (depending on model)
CONS
Consumes small amount of energy (0.8 kWh per cycle)
Cost can vary from mid-range to very expensive
Requires filters every 3-4 months
Not technically compost until added to soil for curing period
COST
RM1,669 + RM110± 3-4 times yearly (for filters)
DURATION
3 hours - 24 hours
Source: https://www.foodcycler.com/post/dirty-dozen-12-top-composting-methods-pros-cons-costs